Output device settings
Starting with reWASD 7.1, Virtual Controller Settings were renamed to Output device settings.
Output device settings serve as the central hub for choosing and configuring your output device, whether physical or virtual.
To begin, simply select the device that you want to designate as the output device from the list displayed on the left side of the window. This choice dictates which device will be recognized by the system as the primary output device.
How to set up an output device
-
Choose the device from the list - whether physical or virtual.
-
The list of available virtual devices includes Virtual Xbox 360, Xbox One, DualShock 4, and Nintendo Switch Pro.
The main difference between Xbox One and Xbox 360: if you have Xbox One controller chosen as the Virtual gamepad, you can tune Vibration settings for the trigger motors and re-route them; and you can use the Xbox One controller as an External device via Bluetooth Adapter.
-
You can use only one controller per all configs you applied to 4 slots of your target device or a device group.
-
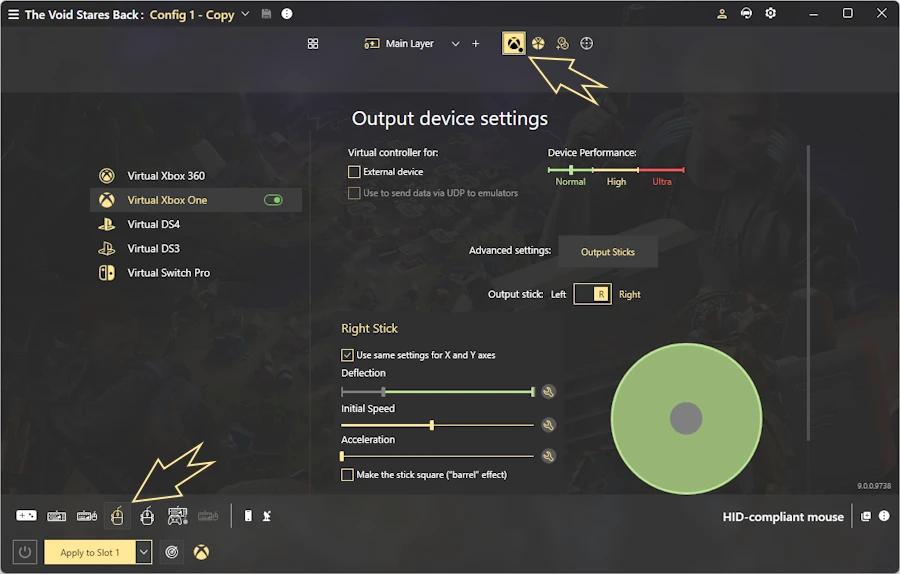
To adjust the type of virtual controller and set how its sticks will work, click an icon with a gamepad logo in the center of the main window on the top.
-
If you have available physical devices, they will appear in the list alongside the virtual ones. Please note that using the "apply to physical device" option requires the config to include gamepad mappings.
You can check whether the controller shows up in the system, if you open joy.cpl. It's a native Windows tool that shows all the currently connected controllers. To do so, open the Windows Search field (or press Windows key), type in joy.cpl, press Enter. Xbox 360 shows up as Controller (XBOX 360 For Windows), DualShock 4 shows up as Wireless Controller, Xbox One shows up as Bluetooth XINPUT compatible input device (compatible with Windows 10 only), Switch Pro shows up as Wireless Gamepad.
-
The physical device you select (indicated by a green checkmark) will be exclusively saved to the config file and given priority when the config is opened. This means that reWASD will first search for the selected device in the system. If it's not found, reWASD will automatically choose a suitable device as the default option.
Please note that deselecting the green checkmark next to the physical device will remove all gamepad mappings. Using the physical gamepad as an output device again will require the gamepad mappings.
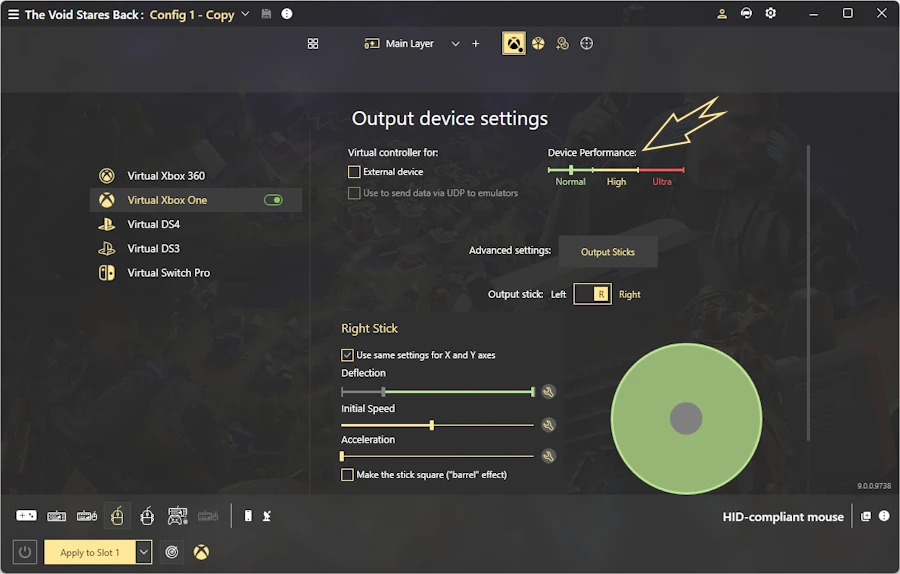
2. Set the device performance for physical or virtual devices. This option helps to speed up gamepad cycling macros and improve responsiveness.
We now offer three performance levels:
-
Normal: Standard performance level.
-
High: Optimized for 500Hz polling rate.
-
Ultra: Optimized for 1000Hz polling rate.
Important Notes:
-
This feature applies only to virtual devices. It does not modify the data, firmware, or reporting rate of your physical device, as these are limited by the device’s default capabilities.
-
This setting does not affect the Nintendo Switch Pro and DualShock 3 virtual devices. These devices always work according to their hardware specifications to ensure maximum compatibility.
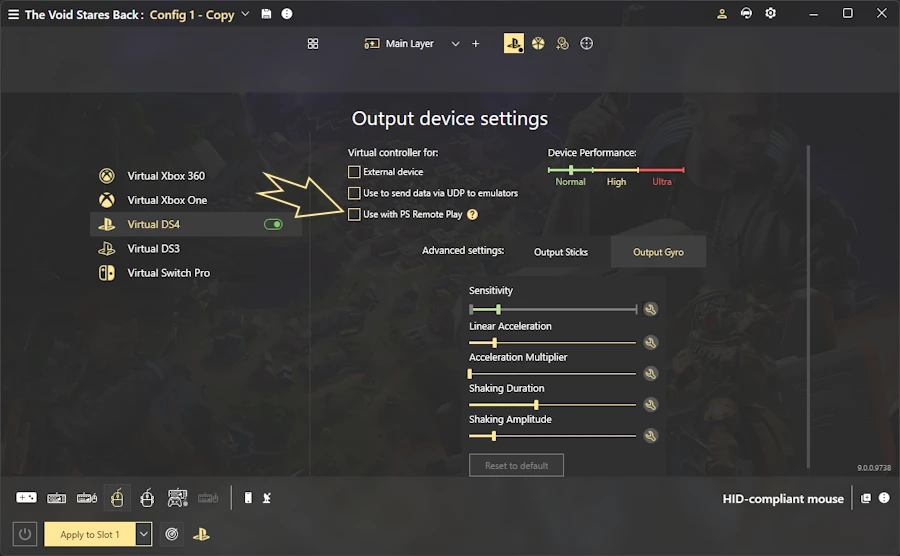
3. For the virtual controller check the External device if you wish to emulate the virtual controller to manage the external device (for example Sony Play Station 4, Nintendo Switch etc). Make sure to set up the adapters properly, with the help of GIMX Adapter Wizard, Bluetooth Adapter Wizard, ESP32 Bluetooth adapter Wizard or ESP32-S2 USB adapter Wizard. To manage previously added and set-up adapters, please visit Preferences — External Devices. The external device option is saved in each config exclusively.
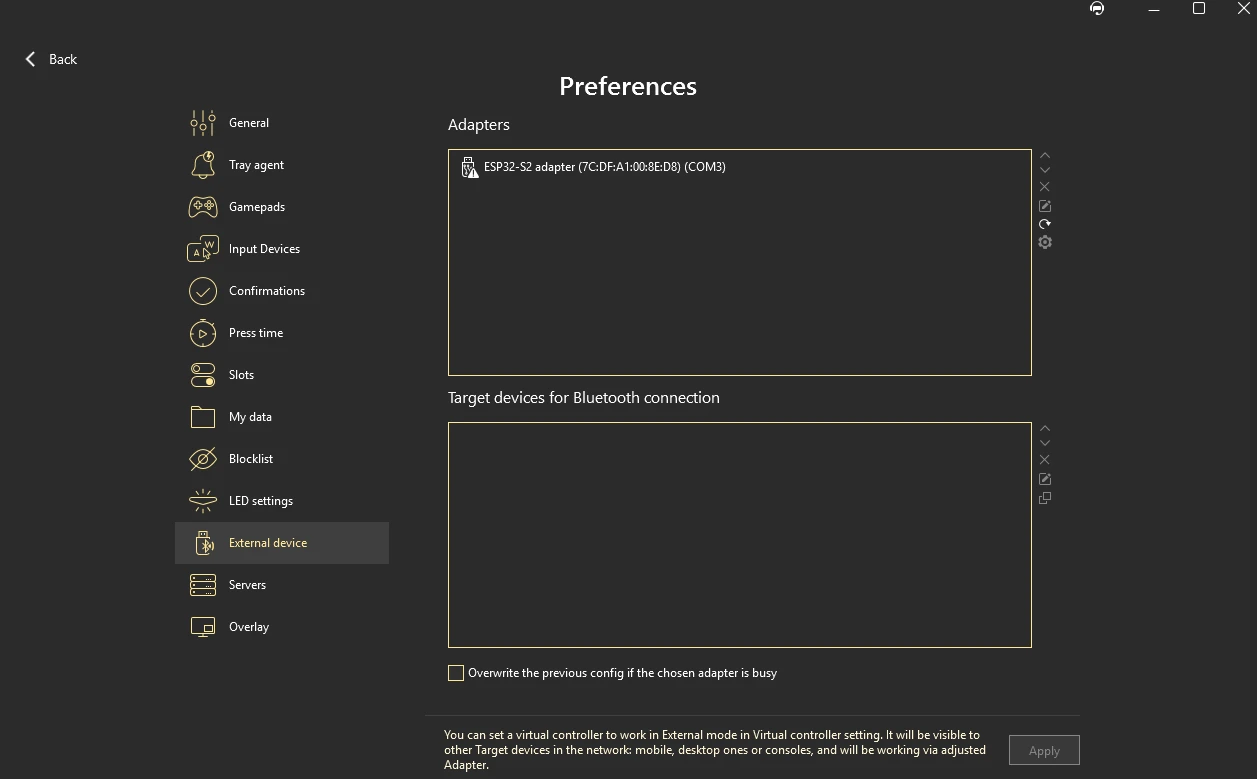
Keep in mind, that reWASD can emulate DualShock 4 and Switch Pro as an external device with Bluetooth Adapter, USB32, USB32-S2 or GIMX Adapter; and Xbox One with Bluetooth Adapter and ESP32-S2 Adapter.
4. For the virtual DS4 controller select to Use for UDP server if you wish to send data of the Virtual DS4 controller to emulators via UDP protocol. Once enabled, you will see the message The UDP server is ready in the lower-left part of reWASD window. Once the config is Applied, you will see The UDP server is started. To make further adjustments for this particular option, visit Preferences — Servers.
 Please note, that UDP server allows to use up to 4 devices at once. So if you wish to Apply configs with an active UDP option to 5 devices, the first device will not send any inputs. And you will see a notification that The UPD server is busy in the lower-left corner.
5. For the virtual DS4/DS3 controller choose "Use with PS Remote Play" if you want to create a virtual device under the physical USB hub, which emulates a real device for PS Remote Play.
Please note, that the "Create virtual devices under physical hub" option is also available in Preferences. If this option wasn't selected before, it will require the PC reboot after applying.
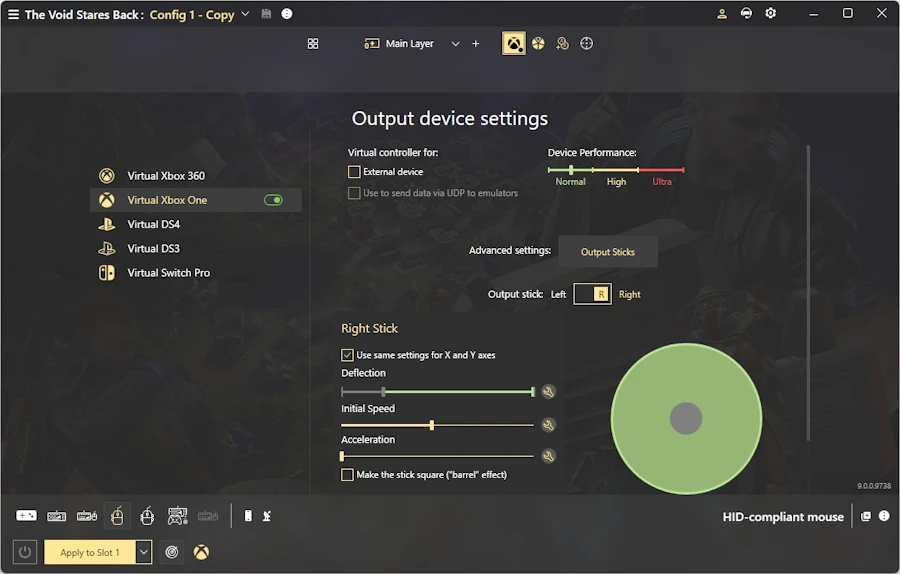
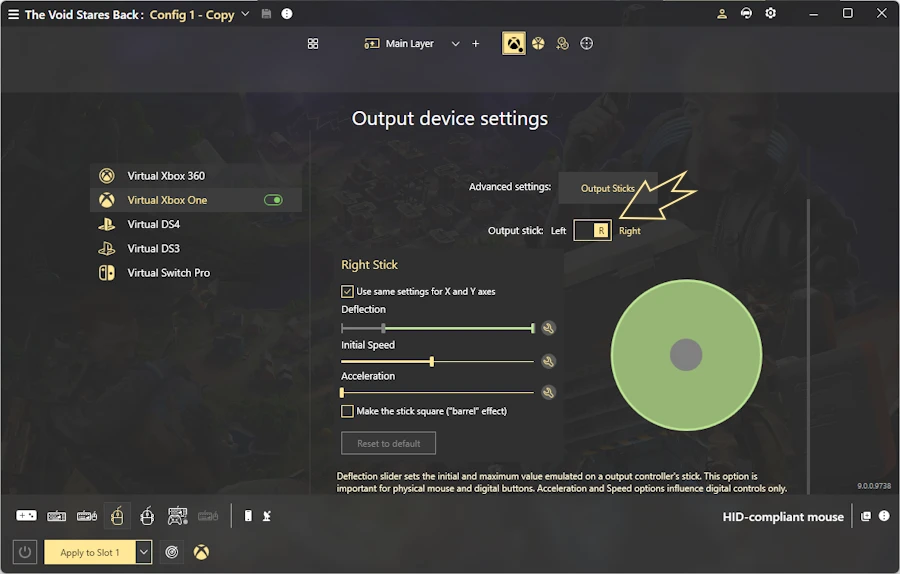
6. Choose a Left or Right stick you want to adjust:
-
Uncheck Use the same settings for X and Y axes if you want to adjust them separately. Note that Max deflection can't be different for X and Y.
-
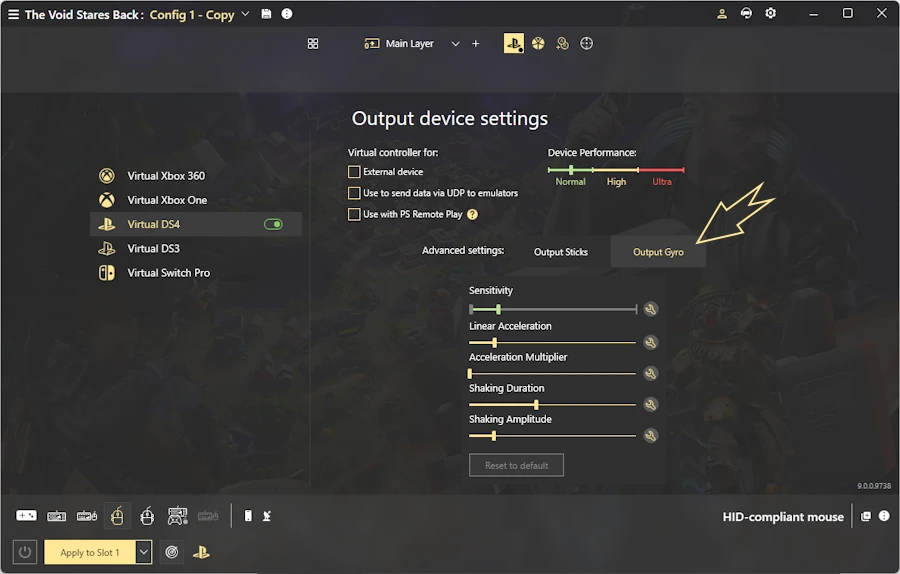
Move sliders to set Deflections: the range in which the stick will be emulated. You can tune both Initial and Max deflections. It is better to increase Initial Deflection if the game doesn't detect the emulated movement at once. Decrease Max Deflection if you need to emulate a stick deflected slightly
-
Move sliders to set the Initial Speed and Acceleration of a virtual stick. The combo of both parameters will show how fast the stick moves when it is mapped to a digital control (WASD on the keyboard, for example). If those parameters are low, you will need to press and hold the physical button longer to get your virtual stick pushed to the edge. On the other hand, you will be able to emulate a slightly deflected stick when you quickly tap the physical control.
Initial Speed and Acceleration parameters affect the Stick mapped to digital keys only, these settings do not affect analogue controls (physical mouse, sticks, triggers).
-
Check the "Make the stick square ("barrel" effect)" option to transform the stick's direction from circular to square. By enabling this option, you can adjust the settings for stick squareness, which determines the extent to which the stick's movement conforms to a square shape rather than a circle.
7. Set the output gyro in case you're using the mappings of Virtual gyroscope