Vibration settings
Vibration settings are part of the Advanced Mapping feature and are available if you have lifetime access (or have purchased them separately as part of a legacy license) or during the trial period.
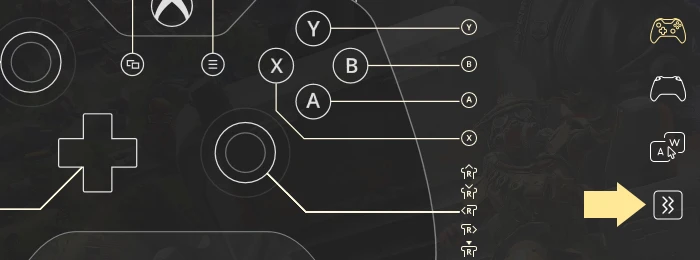
To open the Vibration settings menu, make sure you have chosen the correct gamepad as an active device, create or open a config, and click on the Rumble icon on the right side of reWASD window:

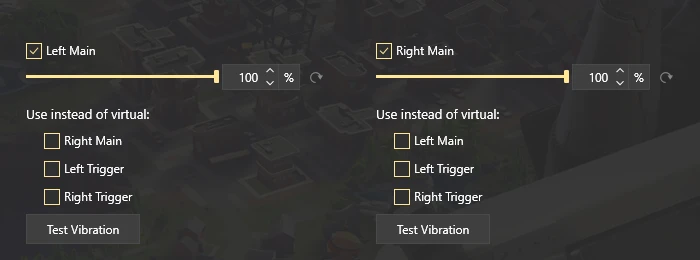
Once you're in this menu, you will see the tiles with settings for the motors that your physical controller has:

- Use the checkbox to enable or disable Left\Right Main\Trigger motors
- Tune the intensity of a motor using a slider, or use the Precise adjustment option to input the value manually
- Pressing 'Test Vibration' will activate vibration on your controller according to the settings.
- Choose a certain motor to Use instead of virtual motors
- Press Reset to default to get back to the initial settings
Some important usecases
- If you want to tune down the overall vibration your controller receives, you only need to tune the needed sliders the way you prefer
- If you want to forward the Trigger vibration the game sends, and execute it on your Main motors, you need to choose Use instead of virtual for the motors responsively. It will look something like this:

Note, that to accomplish this, you need to set Xbox One as a Virtual controller type in Output device settings.