Workspace
If you wish to jump right into reWASD, I suggest checking the First launch article for a brief acquaintance.
Which part of reWASD interface would you like to learn more about?
| Upper-left corner | Central panel |
 |
 |
| Lower-Right corner | Lower-Left corner |
 |
 |
reWASD Basics
Let’s start with the basics to improve the overall understanding of our software. reWASD uses Profiles and Configs to arrange and manage your mapping layouts.
-
Profile is an element that contains configs, usually, one profile is created for one game. When using Autodetect, you assign Process names to the game Profile specifically. In terms of the file system, Profile is a folder.
-
Config is the element that contains all the mappings and layout modifications you add. In terms of the file system, Config is a file with *.rewasd extension.
-
Configs have Sub-configs: this is a part of the Config file responsible for various devices you change the layout for. If you configure a layout for a Group of devices, you will have as many Sub-configs as needed for the whole group, one Sub-config per device.
Sub-configs are applied according to the order of your same-type devices in the group: Gamepad Sub-config is applied to the first controller in the group, Gamepad 2 to the second one, etc.
-
After you launch reWASD and Sign In, this is what you see:
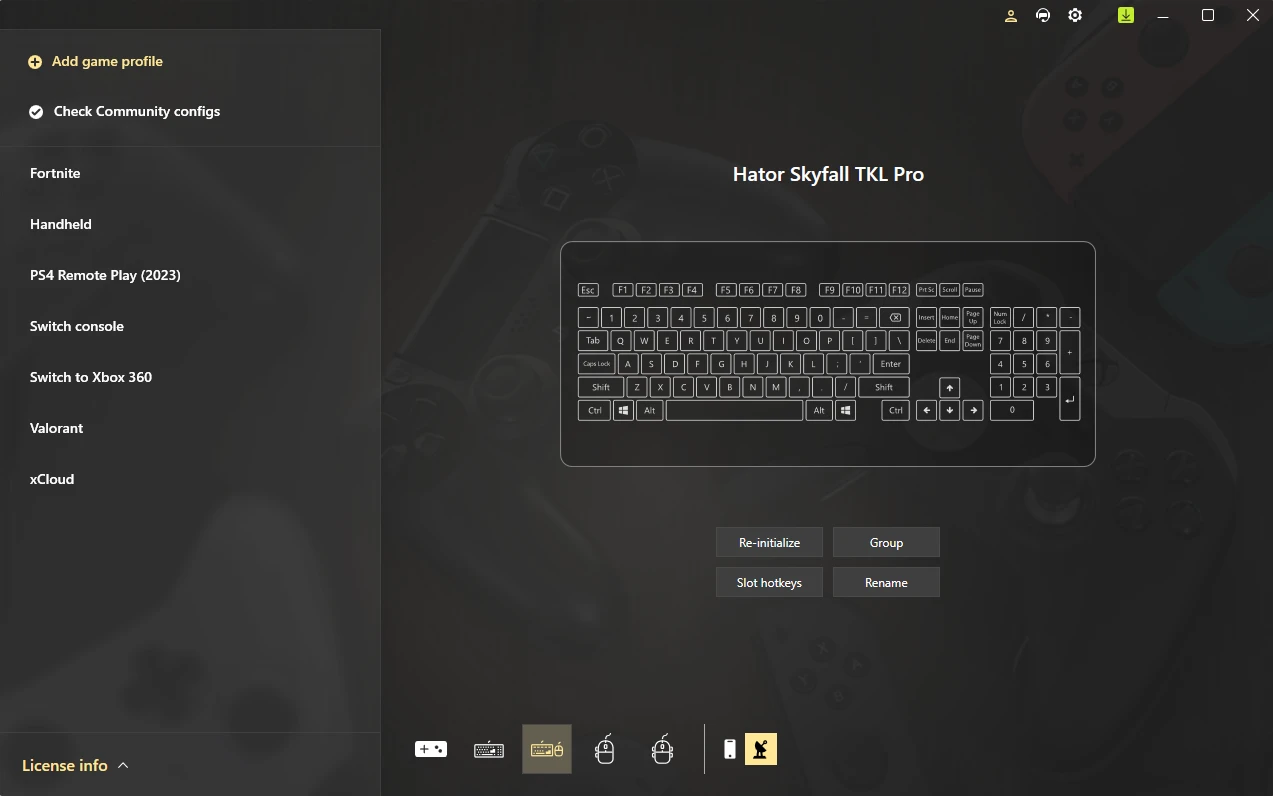
On the left side, you see a Profile panel. Here is where all the existing Profiles are listed, and also you can:
- Add a game profile to create a new profile from scratch
- Check community configs to look through the custom presets our users have uploaded
Below the device's image is the Device panel:
Here are all the devices you can initialize, group, and remap. The devices with [?] mark are mice or keyboards with additional buttons, and you would need to Initialize them before remapping, make sure to use Detection mode for that. You can also see two icons on the right of the devices list:
- reWASD Mobile shows where to download an application for Android or iOS
- Device Detection icon helps you during Device initialization (for keyboards and mice only)
Each of the devices may have several states:
- If the device is greyed-out, it means it was previously connected but is not connected at the moment. The contextual menu allows you to manage it (Group with other devices, Copy device ID, Do not show in reWASD) or Hide until reconnect
- If the device is colored in white, it is currently connected, but not chosen as an active device
- If the device is colored in yellow, it is currently connected and chosen as an active device
Top-right corner gives access to your personal area, which contains your membership information, Help, and Preferences:

- License icon opens the window where you can manage your License
- Help icon opens the list of possible places where you can get support
- Preferences icon opens Preferences and permits you tune reWASD settings
In the center of the screen, you see an active (chosen) device and several quick options that will help you manage it. These options vary depending on an active device:
To start remapping, choose a device you want to remap from the Device panel, then pick a Profile or create one:
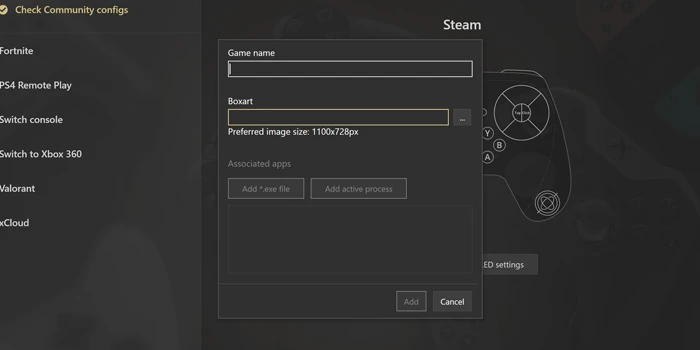
- Set the Game name
- Add an optional Boxart image that shows up in the background of reWASD screen
Upper-left corner
-
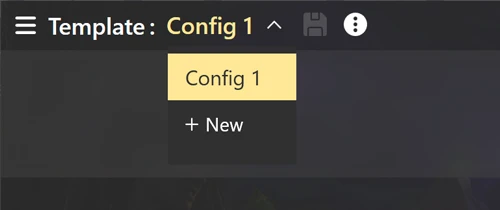
Upper-left corner contains Profile menu you saw previously, tap the burger menu to evoke it
-
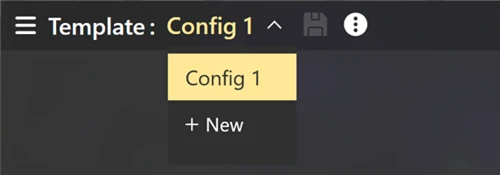
Near the menu icon, you see the name of the Profile, then the name of a chosen Config. To add one more Config, expand the list and click New
-
Use the Save icon to keep the changes
-
Options icon opens a contextual menu for the chosen config, where you can:
- Rename — change the name of a config
- Open file location — see the config file in its storage folder
- Clone to... — duplicate the chosen config
- Share — upload your config to reWASD Community
- Print — create a PDF or print your layout physically
- Clear — remove all mappings from the config
- Delete — remove the selected config
Central panel
-
View icon helps you manage what exactly is displayed in this config right now. Here is what options you have:
- Enable Read-only mode to avoid accidental changes in your config
- Show descriptions
- Show mappings
- Show mappings/descriptions
- Expand Activators to view all the mappings for all Activators on one screen
-
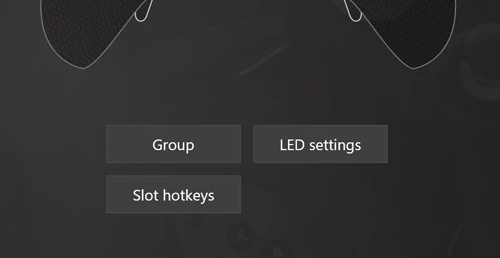
LED settings — manage the LED behavior for a certain config. These settings override the LED settings in Preferences, and are available for gamepads that have LED
-
Main Layer drop-down menu — allows you to choose what layer you are currently browsing and/or editing. Learn more about Shift mode to expand the number of mappings in your configs
-
Output device settings icon — displays the type of a controller that will be used as output device (virtual or physical one).
-
Shortcuts icon — opens the shortcut menu. To go back to the Main interface press this icon once more
-
Show all sub-configs/Hide sub-configs without devices button — permits you to turn on or off the Sub-configs. Works best for the case if you use only one configuration for one device
-
The list of available Sub-configs is located here: you can navigate through the created sub-configs using this list. You'll see the available sub-configs that match the devices added to the group (or just one if you're working with a single device). The naming convention of available configurations can vary depending on the group of devices.
Each sub-config has a contextual menu that will assist you with:
-
Copy the sub-config to all layers;
-
Clear all settings (which clears all settings from all layers in the current sub-config);
-
Copy the sub-config to the current layer (only available for a group of devices);
-
Clear settings from the current layer
-
Split devices into separate sub-configs (only available for a group of devices of the same type when they are affected by a common sub-config);
-
Merge devices into this sub-config (only available for a group of devices of the same type after splitting the sub-config).
-
To add another sub-config, click the + icon and select the desired type of sub-config to add. By default, you can add sub-configs based on the type of devices you have in a group. If you wish to add a sub-config for a different type of device, click the 'Show all sub-configs' button to make available sub-configs for other types of devices. The number of sub-configs for every type of device is limited to 4.
If you have two or more devices of the same type (gamepads, keyboards, or mice) and apply one sub-config, it will affect every device in the group.
Split sub-config to create different sub-configs that may affect devices in a group in different ways. All sub-configs will be applied to the devices based on their order in the group and will inherit the device's name. You can also choose the preferred sub-config and merge all sub-configurations from the same type of device into the selected one.
- The active device image is situated in the center or the main window. To assign a mapping, pick a button, and then choose the mapping itself. You can hook both controller and keyboard buttons to make this process faster. You can preview how your sub-config will affect the behavior of every device by selecting the device icon.
Device view switchers
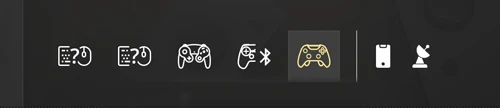
Device view switchers are situated on the right of the device image. Press the corresponding tile to change the view. The list of existing view switchers depends on an active device, here is what they can be:
- Gamepad front buttons
- Gamepad back buttons
- Keyboard
- Mouse
- Additional mouse buttons
- Virtual input device settings — permits changing the settings of the emulated Mouse and Keyboard
- Vibration settings — allows changing haptic feedback settings for the currently selected controller
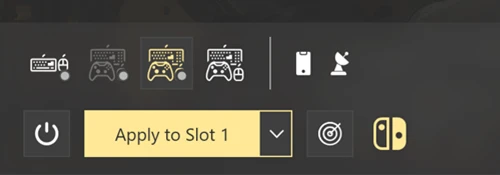
Lower-right corner
The lower-right corner has information about the active device, Slots and Config saved to them:
-
The name of an active device, or a Group of devices is shown first
-
Group icon permits to group the active device with other ones
-
Options icon opens a contextual menu for the chosen device or Group of devices, where you can:
- Rename — change a name for this device or Group
- Group — create a group for a chosen device
- Edit group — modify the chosen Group of devices
- Calibrate — this allows you to re-calibrate the gyroscope. Available for gamepads with gyro only
- Copy device ID — copies a device ID, for further work with Command Line
- Do not show in reWASD — hides the chosen device from the reWASD UI. You can manage previously hidden devices in Preferences — Blocklist
-
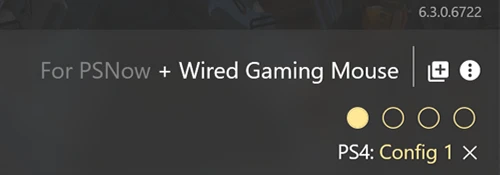
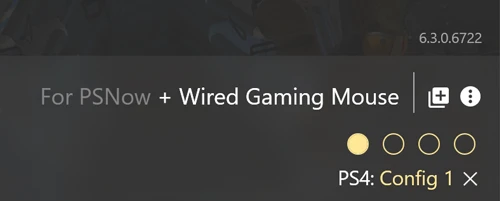
Slots display the currently, or the last active Slot. You can browse the Slots for the active device by tapping on the circles
-
A name of the currently, or the last active Profile and Config is displayed below the Slots (Profile: Config). Tap the cross to remove the assigned config from Slot
Lower-left corner
The lower-left corner shows the Device list, and everything remap-related:
-
Right-click one of the devices to evoke the contextual menu for it
-
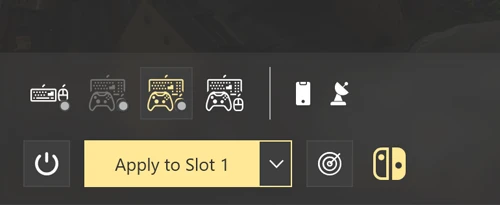
Remap ON/OFF button manages the state of remap
If no config was previously applied to the active device, this button will be greyed-out. After the first Apply and Remap OFF, you can press this button to turn remap back on
-
Apply to Slot saves the modifications and makes the currently displayed config active on the chosen Slot for the active device. Use the drop-down menu to choose which Slot you want to apply this config to
-
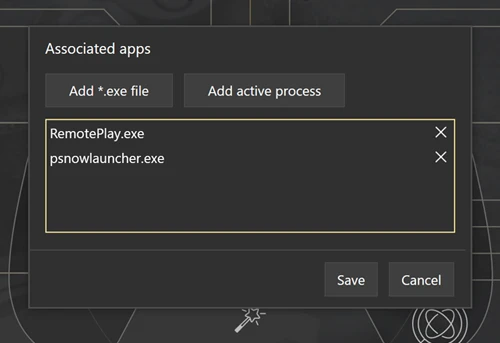
Radar icon helps you manage Autodetect. After the first time you click on it, reWASD will show the window where you can customize the Active processes assigned to the current game Profile:
![Workspace]()
-
Virtual controller icon is displayed next, and corresponds the Virtual controller type for the current config. It is not clickable